-
hamzajoubaa790@gmail.com
- June 9, 2026
That sick feeling when you open your Rogers or Bell bill? We know it well. Between the base package, the “HD technology fee,” the rental for two set-top boxes, and that mysterious $16.99 “Regional Sports Surcharge,” the average Canadian household now pays **between $130 and $170 per month** for television. And that’s before internet.
For that price, you get 400 channels you never watch, blacked-out hockey games that make your blood boil, and a contract that penalizes you for wanting to leave. Enough is enough.
Across the GTA, Metro Vancouver, Calgary, and Halifax, frustrated cable subscribers are finally pulling the plug. They’re discovering what millions worldwide already know: premium IPTV delivers more content, better flexibility, and staggering savings. But there’s a right way and a wrong way to make the switch. Knowing how to safely stream IPTV in Canada separates a seamless, buffer-free experience from a technical headache.
This comprehensive guide walks you through everything—legal realities, hardware requirements, step-by-step setup, and the sports blackout solutions that will make you wonder why you waited so long.
Understanding IPTV: What It Is and Why Canadians Are Cutting the Cord
Internet Protocol Television sounds intimidating, but the concept is brilliantly simple. Traditional cable broadcasts every channel to your home simultaneously—a firehose of data, 99% of which you ignore. IPTV works exactly like Netflix or YouTube: you request a specific channel or movie, and the server sends only that stream directly to your device.
This fundamental difference explains why IPTV is dramatically more efficient and cost-effective. Premium providers aggregate thousands of channels—every major Canadian network (CBC, CTV, Global, Citytv), all US entertainment (HBO, NBC, Fox, ABC), UK programming (BBC, Sky Sports), and international content—into a single, searchable interface.
But not all IPTV is created equal. Free, public M3U playlists you find on Reddit or Telegram? They’re unreliable, overloaded, and usually dead within days. The how to safely stream IPTV in Canada equation starts with one non-negotiable rule: always use a premium, private server. These services invest in enterprise-grade infrastructure, anti-freeze technology, 24/7 support, and encrypted connections.
Ready for the eye-opening part? Premium IPTV typically costs $15 to $25 per month—sometimes less when paid annually. Curious about the exact math? We broke down exactly [how much you can save switching to IPTV], and the numbers are staggering. Most families save over $1,200 annually without losing a single channel they actually watch.
Is IPTV Legal in Canada? What You Need to Know
Let’s address the elephant in the room honestly and objectively. The technology of IPTV is 100% legal. When you stream Netflix, Crave, or Amazon Prime, you’re using identical Internet Protocol technology. Canadian telecom regulations do not prohibit streaming content over the internet.
The legal nuance involves copyright licensing. A service that rebroadcasts copyrighted channels (TSN, Sportsnet, HBO, CNN) without obtaining proper distribution rights operates in a legal grey zone. However, and this is crucial for frustrated consumers: Canadian enforcement has historically targeted commercial resellers, not individual subscribers.
According to the latest [CRTC telecom market monitoring reports], regulators focus on large-scale piracy operations—not Canadians simply watching television in their living rooms. That said, due diligence matters enormously when learning how to safely stream IPTV in Canada.
How to Identify a Safe, Premium Provider
- Transparent payment options: Credit cards, PayPal, or cryptocurrency—avoid sketchy e-transfers to personal email addresses
- Active customer support: 24/7 live chat or ticket system, not just a contact form
- Free trials: Any legitimate service offers 24-48 hour trials (which XtreamIPTV provides)
- Server redundancy: Premium providers maintain multiple server locations to prevent downtime
- VPN-friendly policy: Safe services encourage VPN use rather than banning it
The bottom line? Using a reputable, established IPTV provider with positive community reputation and transparent operations carries minimal legal risk for end-users. The real danger comes from free, public playlists—which often contain malware-infected links or compromised servers.
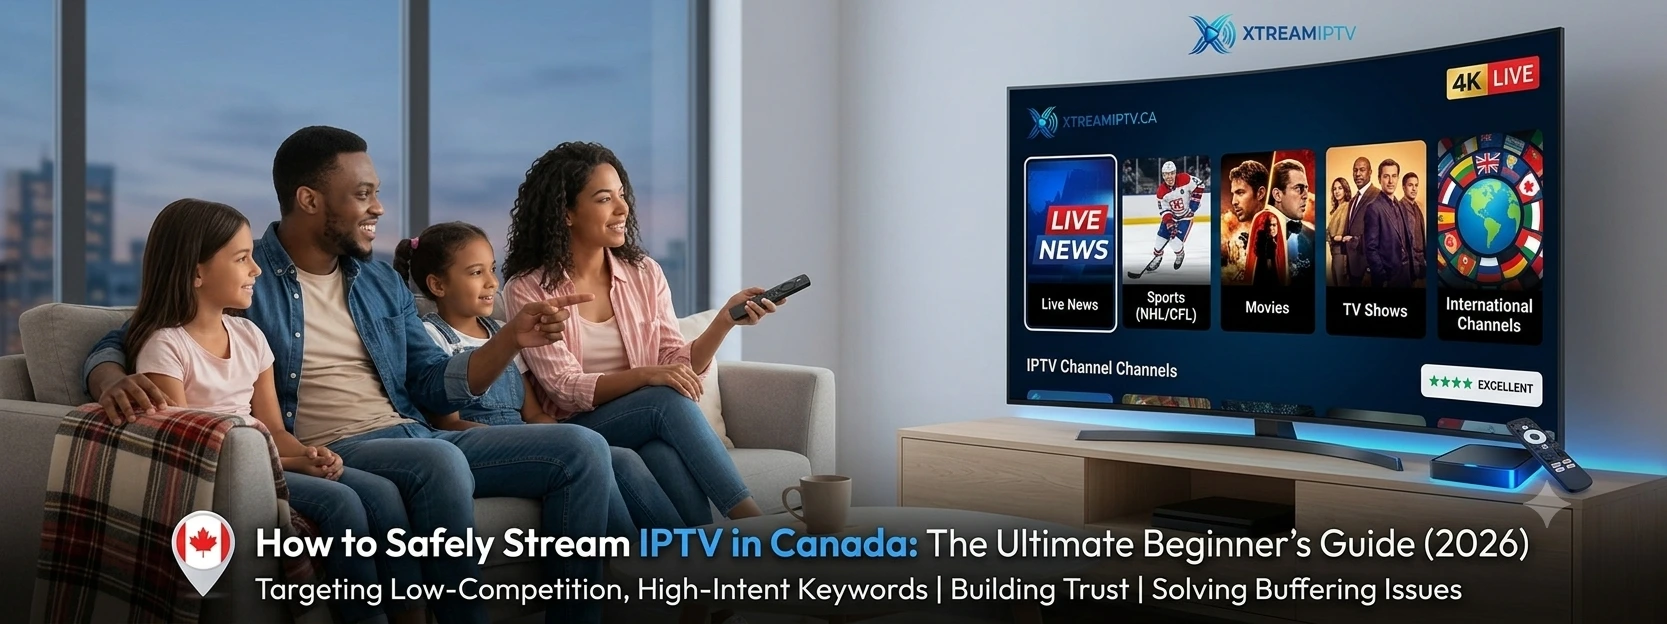
[IMAGE PLACEHOLDER 1: A clean, modern living room with a large 4K TV displaying a diverse streaming dashboard layout showing live news and sports channels]
The Technical Blueprint: Hardware and Software Requirements
Here’s the good news: you probably already own everything you need. Unlike the old days of cable, you don’t need proprietary set-top boxes, coaxial splitters, or technician visits. IPTV works on almost any internet-connected device.
Recommended Hardware for Canadian Streamers
Amazon Firestick 4K (or Firestick 4K Max) – The undisputed champion for cord-cutters. Priced under $70 during sales, it plugs directly into your TV’s HDMI port, runs on Android, and handles 4K HDR streaming effortlessly. The Max version adds Wi-Fi 6 support—ideal if your Bell or Rogers router sits across the house.
Google Chromecast with Google TV – Another excellent option with a cleaner interface than Firestick. Slightly less powerful for heavy IPTV usage but perfectly adequate for most households.
NVIDIA Shield TV Pro – The gold standard for enthusiasts. Overkill for most users at $250+, but if you want the absolute fastest channel changing, DVR capabilities, and AI upscaling, nothing beats it.
Android TV Boxes – Available from brands like Formuler, BuzzTV, and Xiaomi. These offer more customization but require more technical knowledge. Beginners should stick with Firestick.
Your existing smart TV – Many modern LG, Samsung, and Sony TVs support IPTV apps directly through their app stores. However, TV processors are often underpowered, leading to slower guide navigation.
Internet Speed Requirements
- HD streaming (720p/1080p): Minimum 15 Mbps, recommended 25 Mbps
- 4K streaming: Minimum 25 Mbps, recommended 50+ Mbps
- Multiple simultaneous streams: Add 15 Mbps per additional device
Most Canadian internet plans from Rogers, Bell, Telus, and Shaw start at 150 Mbps—more than sufficient. The real issue isn’t speed but stability. We’ll address ISP throttling in the step-by-step setup section.
H3: Choosing the Best IPTV Player App for Your Device
Your IPTV provider supplies the channel feed (usually via an M3U playlist URL or Xtream Codes API). The player app is what displays that feed on your screen, complete with an electronic program guide (EPG), recording features, and catch-up TV.
Two players dominate the Canadian market for good reason:
TiviMate – The premium choice for serious streamers. Its interface resembles a traditional cable guide but with faster navigation, multi-window viewing (watch two games simultaneously), scheduled recording, and automatic EPG updates. The premium version costs approximately $10 USD annually—worth every penny. TiviMate works exclusively on Android devices (Firestick, Shield, Android TV).
IPTV Smarters Pro – The user-friendly alternative, available on Android, iOS, Apple TV, and even Windows. It’s less polished than TiviMate but completely free (with optional paid upgrades). The interface is intuitive for beginners, and it handles both M3U and Xtream Codes seamlessly.
For Firestick users in Canada, the best IPTV player for Firestick Canada is unequivocally TiviMate Premium. Its performance on Amazon’s hardware is unmatched.
How to Install TiviMate on Firestick
- From the Firestick home screen, navigate to the magnifying glass (Search)
- Type “Downloader” and install the Downloader app
- Open Firestick Settings → My Fire TV → Developer Options → Turn ON “Apps from Unknown Sources”
- Open Downloader, enter URL:
https://www.tivimate.com/download - Download and install the TiviMate APK
- Open TiviMate, select “Add Playlist”
- Enter your provider’s M3U URL or Xtream Codes (server URL, username, password)
- Wait for channels to load (30-60 seconds), then enjoy
Step-by-Step Guide: How to Safely Stream IPTV in Canada
Now we reach the core of the matter. Follow these five chronological steps exactly, and you’ll have a secure, buffer-free IPTV setup operational within 20 minutes.
Step 1: Purchase a Premium IPTV Subscription
Skip the “too good to be true” $5/month deals found on Facebook Marketplace or Kijiji. These overloaded servers buffer constantly and disappear overnight. Invest in a reputable provider with demonstrated uptime.
Red flags to avoid:
- No free trial offered
- Payment only via untraceable methods (Bitcoin only, no trial)
- Customer support that takes 48+ hours to respond
- Vague server locations or infrastructure details
Green flags to seek:
- 24-48 hour free trial (like XtreamIPTV’s risk-free offer)
- Multiple payment options including credit card
- Active Discord, Telegram, or support ticket system
- Published server locations (Canada, US, Europe)
Step 2: Subscribe to a Premium VPN (Non-Negotiable)
Here’s the truth most IPTV guides won’t tell you: Canadian ISPs actively throttle streaming traffic. Rogers, Bell, and Shaw use deep packet inspection (DPI) to identify video streams, then artificially slow them down—especially on weekend evenings during NHL playoffs or UFC pay-per-views.
A VPN encrypts all your internet traffic, hiding IPTV data from your ISP. The result? Consistent speeds, no buffering, and enhanced privacy.
Top VPNs for Canadian IPTV users:
- NordVPN: Fastest WireGuard protocol, obfuscated servers specifically designed to defeat ISP throttling
- Surfshark: Unlimited simultaneous devices, excellent value for families
- ExpressVPN: Premium pricing but consistently highest speeds
Setup: Install the VPN app directly on your Firestick (available in Amazon App Store). Connect to a Canadian server (Toronto, Montreal, Vancouver) for minimal latency. Always launch your VPN before opening TiviMate or Smarters.
Step 3: Configure Your Firestick or Android Device
Assuming you’re using a Firestick (Canada’s most popular cord-cutting device):
- Complete initial Firestick setup (WiFi, Amazon account login)
- Navigate to Settings → My Fire TV → Developer Options
- Enable “Apps from Unknown Sources” and “ADB Debugging” (if available)
- Return to home screen, search for and install “Downloader” from Amazon App Store
- Open Downloader, grant storage permissions when prompted
Step 4: Install and Configure Your IPTV Player
Using TiviMate as our reference (the best IPTV player for Firestick Canada):
- In Downloader, type
https://www.tivimate.com/downloadand press Go - Once the APK downloads, click Install
- Open TiviMate after installation completes
- TiviMate will prompt for premium purchase ($10/year approximately)
- Select “Add Playlist” → choose “Xtream Codes API” (simpler than M3U)
- Enter your provider’s Server URL, Username, and Password
- Name your playlist (e.g., “XtreamIPTV Canada”)
- Wait for channel loading (progress bar appears)
- Navigate to Settings → EPG → Update EPG to load the 7-day program guide
Step 5: Connect VPN, Launch, and Test
- Exit TiviMate completely (double-tap home button and swipe away)
- Open your VPN app, connect to a Canadian server
- Return to TiviMate, browse to TSN or Sportsnet
- Verify channel loads within 3-5 seconds
- Test multiple channels to confirm EPG data displays correctly
Troubleshooting Step 5: If channels fail to load, try a different VPN server location. Some IPTV providers block known VPN IP addresses—contact support for whitelisted server recommendations.
[IMAGE PLACEHOLDER 2: An over-the-shoulder shot of an Amazon Firestick remote navigating a modern, fluid IPTV channel guide layout]
The Ultimate Sports Solution: Bypassing Canadian Regional Blackouts
If you’re a Canadian sports fan, you’ve experienced the unique torture of regional blackouts. You subscribe to Sportsnet or TSN specifically to watch your team, only to see: “This program is not available in your region.”
The NHL is the worst offender. A Vancouver Canucks fan living in Victoria might be blacked out from Canucks games because they fall into the “BC regional zone” that requires an even more expensive package. Toronto Maple Leafs fans outside Ontario? Forget watching nationally broadcast games without paying for both Sportsnet and TSN simultaneously.
Then there’s the standalone app nonsense. To legally stream all the sports you want, you’d need:
- [Sportsnet+ subscription plans] at $34.99/month for premium tier
- [TSN+ official pricing updates] at $19.99/month for their streaming service
- MLB.TV at $29.99/month (or $149.99/season) for Blue Jays games out-of-market
- NHL Live at $34.99/month (now rebranded and fragmented)
That’s over $120 per month—more than a full cable bundle!—and you’re still subject to blackouts.
How Premium IPTV Eliminates Sports Blackouts Forever
A single premium IPTV subscription includes:
- All Sportsnet regional feeds (Ontario, Pacific, West, East, and 4K)
- All TSN channels (TSN1 through TSN5, plus TSN4K)
- US sports networks (ESPN, ESPN2, Fox Sports 1, NBC Sports Network, CBS Sports)
- Canadian specialty sports (CBC Hockey Night in Canada, CTV, Global)
- International football (Sky Sports, BT Sport, beIN Sports for Premier League, Champions League, Serie A)
Because IPTV aggregates global feeds, you simply switch to a different regional channel when blackouts strike. Can’t watch the Oilers game on Sportsnet West? Pull up the opposing team’s US feed on ESPN+. Game on.
Real-World Example: NHL Playoffs
During a typical Saturday night with 5 Canadian teams in action, a premium IPTV subscriber watches:
- 7:00 PM ET: Leafs vs. Bruins on the Boston feed (ESPN+)
- 7:30 PM ET: Canadiens vs. Lightning on TSN2 (Montreal feed)
- 10:00 PM ET: Canucks vs. Kings on Sportsnet Pacific
All without switching apps, paying for additional subscriptions, or encountering a single blackout message. This is the freedom that makes cutting the cord Canada finally viable for sports die-hards.
Troubleshooting Common Issues: Buffer-Free Streaming
Even with a premium provider, occasional technical hiccups happen. Here’s your diagnostic playbook for how to fix IPTV buffering quickly.
Baseline Requirements First
Before troubleshooting, confirm you meet minimum thresholds:
- Internet speed: Run a speed test on your Firestick (download the “Analiti” app). You need 25+ Mbps for 1080p, 50+ Mbps for 4K.
- Wired vs. wireless: Ethernet connections are always more stable. Buy a $15 Ethernet adapter for your Firestick if Wi-Fi is unreliable.
- ISP throttling check: Temporarily disable VPN and test a channel. If buffering stops without the VPN, your ISP is throttling—re-enable VPN immediately.
The Buffer-Free Checklist (In Order of Effectiveness)
1. Restart Everything
Unplug your Firestick, router, and modem for 60 seconds. This clears DNS caches and forces fresh connections to your IPTV provider’s servers. Surprisingly effective for 70% of buffering issues.
2. Change VPN Server
Within your VPN app, disconnect and reconnect to a different Canadian city. If you were on Toronto, try Montreal or Vancouver. Some servers become congested during peak hours (7-11 PM).
3. Switch VPN Protocol
In your VPN settings, change from OpenVPN to WireGuard (NordVPN and Surfshark support this). WireGuard is significantly faster and adds minimal latency.
4. Adjust TiviMate Buffer Size
Open TiviMate → Settings → Playback → Buffer Size → Change from “Small” to “Large” or “Very Large.” This gives your device more video cache to absorb network fluctuations.
5. Clear TiviMate Cache
Firestick Settings → Applications → Manage Installed Applications → TiviMate → Clear Cache (not Clear Data). Repeat weekly for optimal performance.
6. Lower Streaming Quality
Some IPTV providers allow quality selection. Drop from 4K to 1080p, or 1080p to 720p. The visual difference on a 55-inch TV is minimal; the buffering improvement is massive.
7. Contact Your Provider’s Support
If you’ve exhausted the steps above, your provider’s server might be overloaded or undergoing maintenance. Premium services respond within minutes via live chat. This is where free or ultra-cheap services fail completely.
For an even deeper technical dive, we’ve documented advanced solutions to [stop IPTV lagging and buffering], including hardware acceleration tweaks and CDN switching techniques used by professional streamers.
[IMAGE PLACEHOLDER 3: A sleek, high-end close-up of a modern black IPTV set-top box alongside a premium smart remote on a clean white media unit]
Conclusion: Take Control of Your Entertainment
You started this article staring at a $150 cable bill, wondering if there’s a better way. There is. Premium IPTV delivers more channels, superior sports coverage, zero blackouts, and the freedom to watch on any device—all for less than the cost of two takeout coffees per week.
We’ve covered the full landscape: the legal realities backed by [CRTC telecom market monitoring reports], the hardware showdown that crowns the Firestick 4K as the people’s champion, the step-by-step tutorial for how to safely stream IPTV in Canada, and the sports blackout solutions that traditional providers refuse to fix.
The only thing missing is your first step.
Here’s what waiting another month costs you:
- Another $130–$170 drained by Rogers or Bell
- Another 30 days of blacked-out hockey games
- Another billing cycle trapped in a system designed to confuse and overcharge
Here’s what switching today delivers:
- Immediate access to 20,000+ live channels and 80,000+ on-demand movies
- Every NHL game, Blue Jays pitch, and CFL snap without regional restrictions
- A setup that pays for itself within 45 days compared to cable
- The satisfaction of finally cutting the cord Canada-style
Ready to Join the IPTV Revolution?
At XtreamIPTV, we’ve built the premium service we’d want for our own families: enterprise-grade Canadian-friendly servers, 24/7 Calgary-based support, and a 24-hour free trial that lets you verify everything before spending a dollar.
Claim your risk-free trial in under 60 seconds:
- No credit card required for the trial period
- Full access to all 20,000+ channels including every TSN, Sportsnet, and US sports network
- Setup assistance via live chat if you need help
The cable monopoly ends today. Click below, start your trial, and experience television the way it should be: affordable, unlimited, and completely under your control.
[Start Your 24-Hour Free Trial with XtreamIPTV]